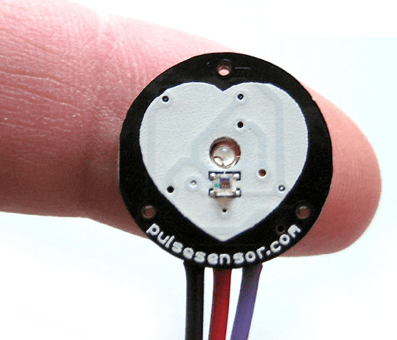
I first read about Yuri Gitman and Joel Murphy‘s PulseSensor a few months ago in MAKE Magazine and was intrigued by its simplicity. Last month, I decided I was going to get one to track my heart rate during my conditioning class at circus and I planned to have it ready for my first class. Turns out they were all out of stock, and the date for new stock got pushed a couple of times. MakerShed said they could ship within 1-2 days but I wanted to order direct so they’d get a bigger slice of the order (and I wasn’t sure if the 1-2 days was accurate as I figured they didn’t actually stock it).
I received notification this morning that they had new stock, and it’s a new and improved ‘Amped‘ version (with amplification and noise cancellation circuitry to the hardware) (note: the new version is 25% higher in price). I’m very pleased that I placed the order 53 minutes after the initial email, and less than 2 hours later it has been shipped. It’s coming standard USPS (with a shipping cost of 60% of the product price) so hopefully I won’t get dinged with Customs handling and GST (for another 50% of the product price).
I’ll update you when it has arrived and once I’ve hacked together something of use to quantify myself during extreme exercise. In the mean time, check out Becky Stern‘s ‘Beating Heart Headband‘
I’ve been toying around with some electronics projects the last few months, but have been putting off the basic requirement of actually soldering anything. I got a basic iron and misc tools around 6 weeks ago, and a couple of components that needed assembly (piggy backed on our robot order) but just hadn’t made the leap. Until now.
I started with the 7-Segment Serial Display (Blue) (ordered from Solorbotics) which needed a few wires attached if I was going to do any prototyping with it. From looking around it looked like I only needed to wire-up the Gnd and the Vcc connections (these were labelled on the circuit board). After putting way too much solder on the first pin (and subsequently using my ‘solder sucker’ to clean it up) the next pin went smoother. After looking at some example code it became clear I also needed to wire up the “Rx” connection as well. Three wires total soldered up. Just plugging it into the arduino made it display 4 zeros so that told me it was operational. Update: you don’t actually have to solder these wires on… just bending them through the holes would have worked too.
These projects are still a bit obscure for me, so I wasn’t sure how to get started. I read through the User Manual which was clear enough, but I figured there was code out there already. I found this wall of text which I managed to digest down into this gist (and updated it thanks to these notes) which you can see running in the above video.
This file contains hidden or bidirectional Unicode text that may be interpreted or compiled differently than what appears below. To review, open the file in an editor that reveals hidden Unicode characters.
Learn more about bidirectional Unicode characters
While the ‘iron was still hot’ (ok, not really but it sounded good — I actually waited until my son was home so he could watch) I put together the next project, which was a NunChucky Wii Nunchuck I2C Breakout Adapter . This adapter required some headers (male & female) to be soldered on (while the WiiChuck wouldn’t have). For the first bit of soldering I used my little ‘helping hands’ gizmo for holding both the circuit board, and the wire going in, so my hands were free; this time around I just set it on the table with the header poking through and soldering it that way. This resulted in a slightly lop sided connection. For the 2nd header, I used my other ‘helping hands’ (i.e. my son) to so we could solder with 4 hands instead of 2. I made a video of the NunChucky in action too (and combined with the 7-Segment display) if you’re curious.
This file contains hidden or bidirectional Unicode text that may be interpreted or compiled differently than what appears below. To review, open the file in an editor that reveals hidden Unicode characters.
Learn more about bidirectional Unicode characters