Tag Archives: programming

NYCL Scratch Day Diary

We’ve been looking forward to Scratch Day for a couple of months now, and am happy to say it went off wonderfully.Facepainted 7 Year Old ready to lead his first Scratch Day
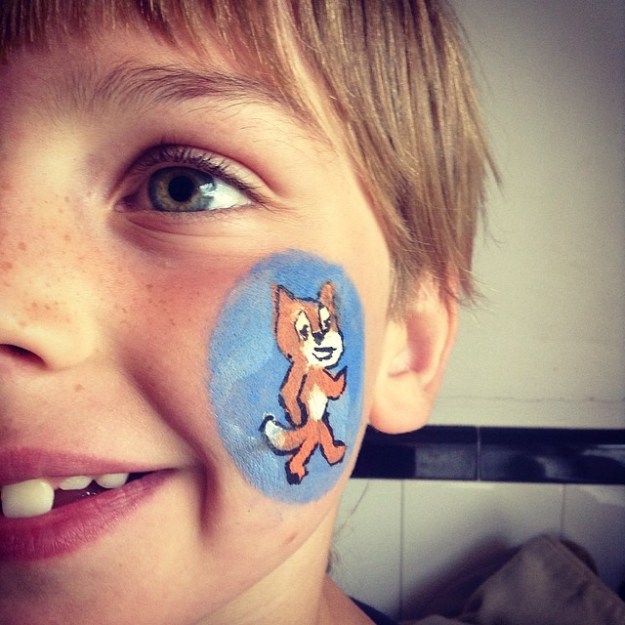
It was five months ago today that we checked out No Starch Press’s SUPER SCRATCH PROGRAMMING ADVENTURE from the library, and it was this past Saturday that Xander revealed Scratchy to 15 more kids, ages 7 to 12, as the culmination of his hard work.

After we shared his Scratchy themed birthday cake (he turned 7 in January) with the Lifelong Kindergarten Group at MIT, I learned of ScratchEd (thanks @TwilightDreamWolf for the heads-up) and their role in helping to bring Scratch to more kids.  From their group, I learned of Scratch Day and looked into where we could go to meet other Scratchers in Toronto, only to find there wasn’t anything already organized.    Thinking about possibilities of organizing something to help foster his passion, I mentioned the idea to him and he said he’d love to teach kids to do it — which cinched it, this was going to happen if he was this keen about it.

There is an amazing technology vibe in Toronto, so I knew there would be many ways to go about the event.  Part of me wanted to see if people at UofT would want to be involved, to keep the university feel of Scratch, but I didn’t have any current contacts there to work.  Working the start-up vibe was another angle I considered, but was a bit wary of the sponsorship angles inherent with that culture.  When I was at an early Maker Series event at the Toronto Reference Library, in connection with their new Digital Innovation Hub, I saw they had the new version of the SUPER SCRATCH book in their collection (which isn’t available in the Library’s main collection). I inquired asked about the possibility of doing Scratch Day there, and they declined saying they didn’t have a kid friendly space.  This brought me to our local library, North York Central Library, which we have a good rapport with.

I introduced the idea to them, and they did some research to see if it might be a good fit.  We arranged to meet and Xander shared his enthusiasm for Scratch and we discussed some of the ideas for what the day could be.  We settled on a small introductory class for kids aged 8-12 accompanied by their parents as a trial run.  Coordination with the Learning Centre in the Teen Zone/Hub at the library, outside of the Children’s Department usual dealings and recruitment  within the Teen Department’s Youth Advisory Group to find volunteers to help mentor during the class was done.  Much thanks to Sharon Andic, and Kathryn Copeland for their work in preparing the program, and to Chantee, Charles, and Wendy for their work during the class helping the kids out.

We announced the class on a blog setup for the event at ScratchDayNYCL.tumblr.com and the library put it in their Spring Flyer of events.  Registration quickly filled up with positive comments from parents.  Xander practiced his instruction skills with a friend, going early to our Homeschool Group at the library for a few weeks.  We also arranged to tour the Learning Centre space to get a feeling of the room and what was available there and discuss the format and layout of the pairs.  Everything was set — I was more nervous than he was.

The biggest hurdle was going to get through introductions, as he was really struggling with that part in our practice session.  Kathryn agreed to introduce him which worked out great.

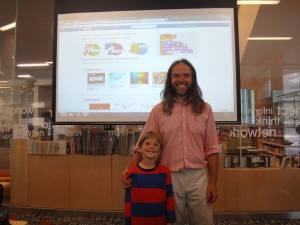
The class went very well.  We managed to squeeze in two extra groups who arrived morning of to see if anyone didn’t show-up.  Many smiles and much enthusiasm from the kids gathered (and a few handstands from the leader).  We made a NYCL Scratch Club Studio on the Scratch website to help encourage the kids to collaborate and build their skills together going forward.  We ran over our time estimates (of course) so we didn’t get to do the maze program he planned, and we didn’t get to show some of our ‘Connecting to the Physical World’ projects as we had hoped.  His response?  “We’ll just have to have another class.”

Naxder and his Dad leading Scratch DayNot only that, he came home and asked to start to write a book about Scratch, for his “55%”ers, those we know a bunch of scratch but want to do more advanced things.  When he started Scratch, he didn’t read and he learned so he could do more Scratch.  I guess it will also be his gateway to writing too!

A very proud Papa.


I can solder! 7-Segment Serial Display & Nunchucky operational

I’ve been toying around with some electronics projects the last few months, but have been putting off the basic requirement of actually soldering anything.  I got a basic iron and misc tools around 6 weeks ago, and a couple of components that needed assembly (piggy backed on our robot order) but just hadn’t made the leap.  Until now.

I started with the 7-Segment Serial Display (Blue) (ordered from Solorbotics) which needed a few wires attached if I was going to do any prototyping with it.  From looking around it looked like I only needed to wire-up the Gnd and the Vcc connections (these were labelled on the circuit board).  After putting way too much solder on the first pin (and subsequently using my ‘solder sucker’ to clean it up) the next pin went smoother.  After looking at some example code it became clear I also needed to wire up the “Rx” connection as well.  Three wires total soldered up.  Just plugging it into the arduino made it display 4 zeros so that told me it was operational.  Update: you don’t actually have to solder these wires on… just bending them through the holes would have worked too.

These projects are still a bit obscure for me, so I wasn’t sure how to get started.  I read through the User Manual which was clear enough, but I figured there was code out there already.  I found this wall of text which I managed to digest down into this gist (and updated it thanks to these notes) which you can see running in the above video.

// example of using 7-Segment Serial Display
// product available from https://www.sparkfun.com/products/9765
// based on code from http://www.arunet.co.uk/tkboyd/ec/ec1led4x7ser.htm
// Note: solder wires at Gnd/Vcc & Rx, Rx goes to a digital pin on the arduino.
// Video available at http://www.youtube.com/watch?v=YVMAzYqV4kg
// Blogged @ https://chrisnolan.ca/2012/08/05/i-can-solder-7-segment-serial-display-nunchucky-operational/
#include <SoftwareSerial.h> // Arduino 1.0 included
#define SerInToArdu 2
#define SerOutFrmArdu 3 // pin it's plugged into
#define wDelay 300//no ; here. Sets how long each "message" appears
SoftwareSerial mySerialPort(SerInToArdu,SerOutFrmArdu);
// The above creates the serial channel we will use.
void setup(){
pinMode(SerOutFrmArdu,OUTPUT);
pinMode(SerInToArdu,INPUT);//Not actually needed...
mySerialPort.begin(9600);
mySerialPort.print("v"); //To reset display module
};
void loop(){
default_example();
scroll_word("4321");
scroll_word("87654321");
scroll_word("HELLo noLAn");
scroll_word("123456789");
mySerialPort.print("xxxx");//Send an "x" to turn a digit off
delay(wDelay);
delay(wDelay);
};
void default_example() {
mySerialPort.print("1234");
delay(wDelay);
mySerialPort.print("234x");
delay(wDelay);
mySerialPort.print("34xx");
delay(wDelay);
mySerialPort.print("4xxx");
delay(wDelay);
mySerialPort.print("xxxx");
delay(wDelay);
mySerialPort.print("----");
delay(wDelay);
mySerialPort.print("8888");
delay(wDelay);
mySerialPort.print("HEL0");
delay(wDelay);
mySerialPort.print("NoLA");
delay(wDelay);
mySerialPort.print("oLAn");
delay(wDelay);
mySerialPort.print("LAnx");
delay(wDelay);
mySerialPort.print("Anxx");
delay(wDelay);
mySerialPort.print("nxxx");
delay(wDelay);
};
void scroll_word(String w) {
int length = w.length();
if (length <= 4) {
mySerialPort.print(w);
delay(wDelay);
} else {
w = " " + w + " ";
for (int i=0; i<= length+4; i++) {
mySerialPort.print(w.substring(i,i+4));
delay(wDelay);
}
}
}
view raw gistfile1.ino hosted with ❤ by GitHub

While the ‘iron was still hot’ (ok, not really but it sounded good — I actually waited until my son was home so he could watch) I put together the next project, which was a NunChucky Wii Nunchuck I2C Breakout Adapter .  This adapter required some headers (male & female) to be soldered on (while the WiiChuck wouldn’t have).  For the first bit of soldering I used my little ‘helping hands’ gizmo for holding both the circuit board, and the wire going in, so my hands were free; this time around I just set it on the table with the header poking through and soldering it that way.  This resulted in a slightly lop sided connection.  For the 2nd header, I used my other ‘helping hands’ (i.e. my son) to so we could solder with 4 hands instead of 2.  I made a video of the NunChucky in action too (and combined with the 7-Segment display) if you’re curious.

The code for the Nunchucky is based on Tod Kurt’s library (which he based on Chad Phillips code) and you can see my mods to his demo in this gist to output the button presses to the display.  Aside: did you know a “1” is different than a ‘1’ in Arduino?

/*
* WiiChuckDemo --
*
* 2008 Tod E. Kurt, http://thingm.com/
*
* with code for 7-Segment Display added by Chris Nolan.ca
* based on https://gist.github.com/3268581
*
*/
#include <Wire.h>
#include "nunchuck_funcs.h"
#include <SoftwareSerial.h>
int loop_cnt=0;
byte accx,accy,zbut,cbut;
int ledPin = 13;
#define SerInToArdu 2
#define SerOutFrmArdu 3
#define wDelay 300
SoftwareSerial mySerialPort(SerInToArdu,SerOutFrmArdu);
String seven_seg;
void setup()
{
pinMode(SerOutFrmArdu,OUTPUT);
mySerialPort.begin(9600);
mySerialPort.print("v");
seven_seg = "x--x";
mySerialPort.print(seven_seg);
Serial.begin(19200);
nunchuck_setpowerpins();
nunchuck_init(); // send the initilization handshake
Serial.print("WiiChuckDemo ready\n");
}
void loop()
{
if( loop_cnt > 100 ) { // every 100 msecs get new data
loop_cnt = 0;
nunchuck_get_data();
accx = nunchuck_accelx(); // ranges from approx 70 - 182
accy = nunchuck_accely(); // ranges from approx 65 - 173
zbut = nunchuck_zbutton();
cbut = nunchuck_cbutton();
Serial.print("accx: "); Serial.print((byte)accx,DEC);
Serial.print("\taccy: "); Serial.print((byte)accy,DEC);
Serial.print("\tzbut: "); Serial.print((byte)zbut,DEC);
Serial.print("\tcbut: "); Serial.print((byte)cbut,DEC);
if (zbut == 0) {
seven_seg.setCharAt(0, '0');
} else {
seven_seg.setCharAt(0, '1');
};
if (cbut == 0) {
seven_seg.setCharAt(3, '0');
} else {
seven_seg.setCharAt(3, '1');
};
mySerialPort.print(seven_seg);
Serial.print("\t7Seg: "); Serial.println(seven_seg);
}
loop_cnt++;
delay(1);
}
view raw gistfile1.ino hosted with ❤ by GitHub

Next time, don’t put off til tomorrow what you can do today.

What will you make?

Athenaeum — A Toronto Public Library & Goodreads.com Interface

I’ve a heavy user of the Toronto Public Library and recently started using Goodreads.com, so I decided to join them together.

For now I just automatically take my checked out items and add them to some shelves on goodreads. You can see how I did it, and do it yourself too by checking out the Athenaeum project on github.

To see all the items I’ve checked out of the library since starting using this script, review my Checked-Out Shelf at goodreads.

Thanks